Posted: June 14, 2016
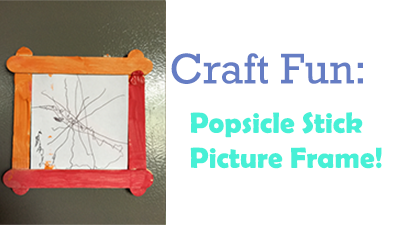
Every parent knows the amount of pride a child feels when they accomplish a goal. Crafts, especially art projects, are a common source of joy in the family home. Our latest craft suggestion carries with it two options: allowing for your child to create the frame that can also feature future creations! We hope this is a fun project for your family that builds more confidence in your child with special needs while serving as a unique gift, decoration, project and more!
Entry Version

Materials:
- 7 jumbo popsicle sticks
- Glue
- Assorted paints
- 4 Round Magnets
- Tape
- String
- Paint brushes
Step 1: With two of the popsicle sticks, lay them horizontal and parallel to each other.

Step 2: With two more sticks, lay and glue them vertically so the tips are touching the horizontal sticks. Your child can help apply pressure to the popsicle sticks to help it stick.

Step 3: Glue another two sticks over the horizontal sticks from step 2. Your child can help apply pressure to the popsicle sticks to help it stick.

Step 4: Glue the last popsicle stick diagonal so it touches the vertical sticks. Your child can help apply pressure to the popsicle sticks to help it stick.

Step 5: To make this picture frame a magnet, apply a round magnet to the back of each corner of the frame.

Step 6: Allow the picture frame to dry.
Step 7: Cut some string that will be used to help hang the frame.
Step 8: Tape the ends of the string on the back horizontal stick. There should be a loop of string so the picture frame can be hung.

Step 9: Allow the child to paint the popsicle stick frame with whatever colors they chose. Allow time for it to dry.

Step 10: Slide the picture in between the popsicle sticks. The layers of popsicle sticks will keep the picture in place.
Note: You will have to cut a picture to the size of the frame.
Step 11: Hang the picture frame up or stick it to the fridge and enjoy.

Advance Version

Materials:
- 7 jumbo popsicle sticks
- Glue
- Assorted paints
- 4 Round Magnets
- Tape
- String
- Paint brushes
- Assorted craft materials (glitter, buttons, feathers, pom poms, etc.)
- Paper plate
Step 1: Complete steps 1-8 of the entry version.
Step 2: Put some some paint onto a paper plate and add glue to each color and mix.
Step 3: Allow the child to paint the popsicle stick frame with whatever colors they chose.

Step 4: Allow the child to stick on the assorted craft materials. The glue from step 2 will help the materials stick. If needed, you can always brush more glue onto the popsicle stick frame. Allow time for the entire frame to dry.

Step 5: Slide the picture in between the popsicle sticks. The layers of popsicle sticks will keep the picture in place.
Note: You will have to cut a picture to the size of the frame.
Step 6: Hang the picture frame up or stick it to the fridge and enjoy.


